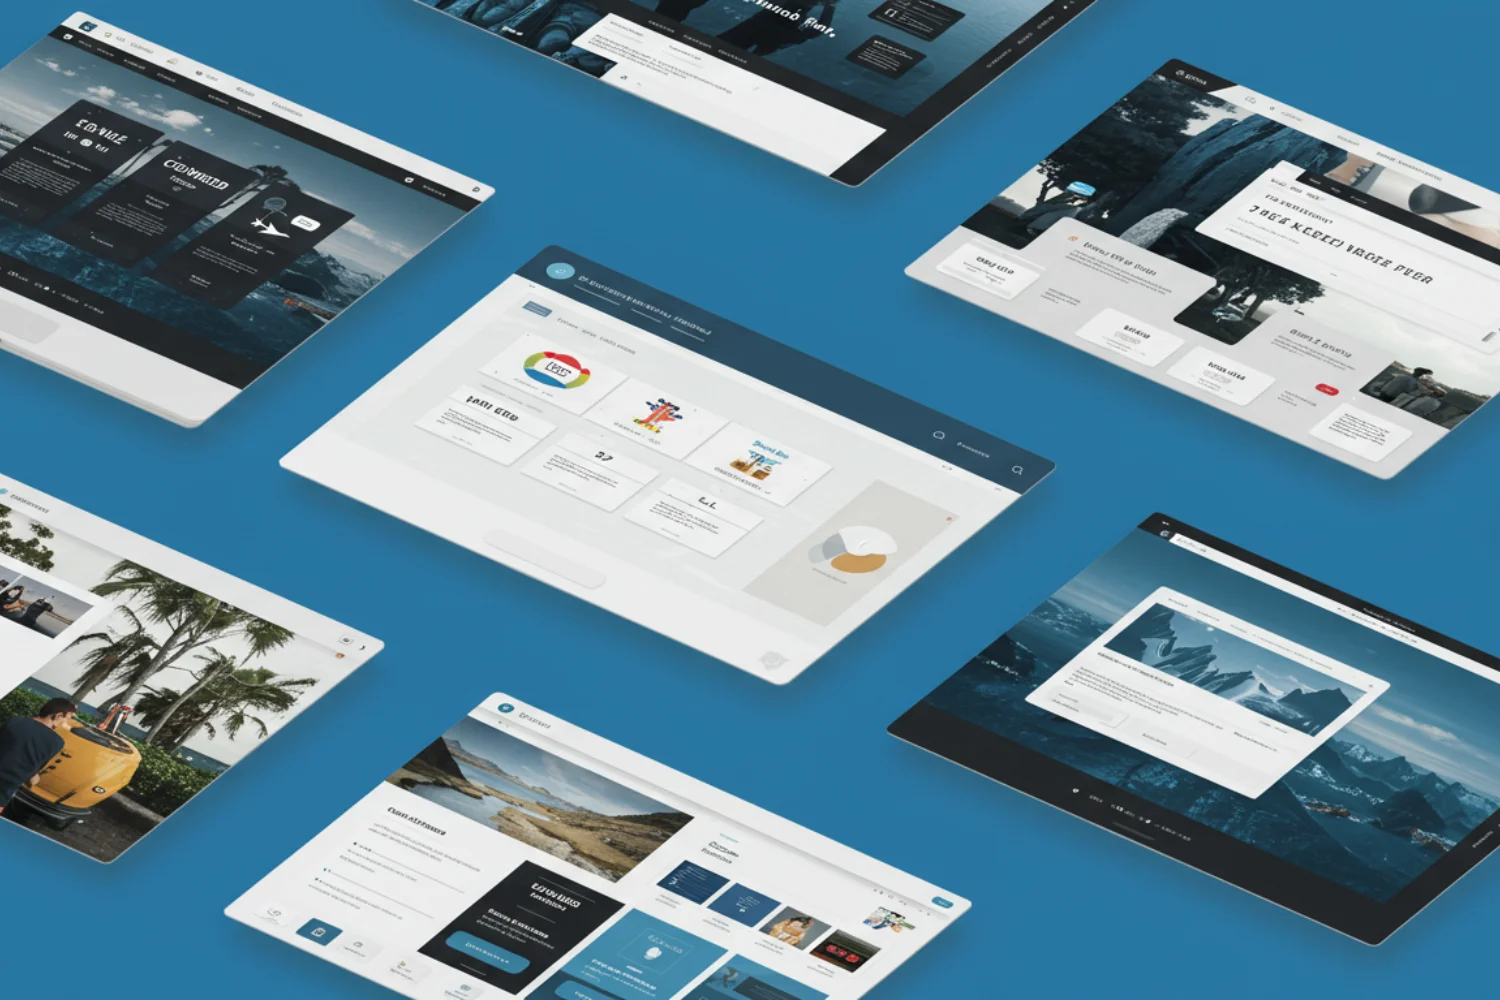
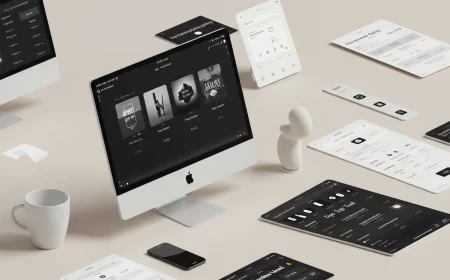
In the dynamic and increasingly competitive digital landscape, establishing a strong online presence is paramount for individuals, startups, small businesses, and even larger organizations. However, the traditional path of web development—requiring deep coding knowledge, extensive time commitments, and often significant financial investment—can be a daunting barrier. This is precisely where Webflow free templates emerge as a powerful, democratizing force, offering an accessible and efficient pathway to creating stunning, high-performance websites.
Webflow, as a pioneering no-code visual development platform, has revolutionized how websites are built. It empowers designers, marketers, and entrepreneurs to craft bespoke web experiences with unparalleled creative control and speed, all while generating clean, production-ready code behind the scenes. While Webflow’s true potential shines in custom-built projects, its extensive and ever-growing library of templates, particularly its robust selection of free options, serves as an invaluable accelerator. These pre-built website structures provide a meticulously crafted foundation, allowing users to bypass the initial setup and structural design phases, and instead, dive directly into customization, content population, and strategic refinement. This dramatically reduces the time-to-launch and lowers the barrier to entry for professional web design.
This comprehensive guide will embark on an in-depth exploration of Webflow free templates. We will meticulously detail what they are, demystifying their underlying structure and distinguishing them from conventional templates. We will pinpoint the most reliable sources for discovering these digital assets, illuminate the multifaceted benefits they confer upon users, and critically examine the essential considerations one must bear in mind when selecting and utilizing them. Furthermore, we will provide practical, actionable advice on how to effectively leverage these templates to transform your digital vision into a tangible, impactful online reality. Finally, we will present an extensive, curated list of over 50 top-tier free Webflow templates and cloneable projects, complete with their direct links, offering an unparalleled starting point for your next web venture.
What Exactly Are Webflow Free Templates? Demystifying the Foundation
At their core, Webflow free templates are fully designed, pre-built website projects that users can instantly clone and integrate into their own Webflow account. What sets them apart from templates offered by many other website builders is their inherent flexibility and the underlying power of the Webflow Designer.
Imagine a traditional website template as a pre-fabricated house where you can change the paint color and some furniture, but altering the floor plan requires an architect and a construction crew. A Webflow template, in contrast, is more like a meticulously engineered set of building blocks and a detailed blueprint. While the blocks are arranged to form a complete structure, you retain full access to each individual block, the connections between them, and the tools to rearrange, resize, or even create entirely new blocks.
Specifically, this means:
- Native Webflow Elements: Every component within a free template—from
Div BlocksandSectionstoHeadings,Paragraphs,Images, andForms—is a native Webflow element. This ensures that they are fully editable using Webflow’s visual interface, just as if you had built them from scratch. - CSS-Based Styling: The styling (colors, fonts, spacing, shadows, borders, etc.) is applied using Webflow’s visual CSS panel. This means you’re not dealing with hard-coded styles but rather editable CSS properties and classes, giving you granular control over the design.
- Responsive Design Principles: All official Webflow templates are built with responsive design in mind. They utilize modern CSS techniques like Flexbox and Grid, visually managed within Webflow, to ensure layouts adapt gracefully to various screen sizes (desktop, tablet, mobile). You can inspect and adjust these responsive settings directly.
- Clean, Semantic HTML: Webflow automatically generates clean, semantic HTML5 code from your visual designs. This is crucial for search engine optimization (SEO) and accessibility, as search engines can easily understand the structure and content of your site.
- CMS Integration (Often): Many free templates come pre-configured with Webflow CMS (Content Management System) Collections. This means they have dynamic content structures ready for you to populate with blog posts, portfolio items, team members, testimonials, or any other repetitive content. You can then manage this content easily through the intuitive Webflow Editor, often without touching the Designer.
- Interactions and Animations (Sometimes): Some free templates showcase Webflow’s powerful Interactions engine, featuring pre-built animations like scroll-based effects, hover states, or loading animations. These can be inspected, modified, or extended to add dynamic flair to your site.
In essence, Webflow free templates are not rigid, restrictive skins. They are fully functional Webflow projects that serve as intelligent starting points, allowing users to bypass the initial setup and structural design phases. This empowers you to jump directly into customization and content creation, significantly accelerating the design and launch process while maintaining professional quality and full creative control.
Where to Discover Your Next Webflow Free Template
Webflow’s commitment to accessibility and community engagement has led to several excellent resources for finding free templates:
-
The Official Webflow Templates Page (Your Primary Hub)
- Location: The most reliable and frequently updated source is the official Webflow Templates page, accessible directly at https://webflow.com/templates.
- Filtering for Free: On this page, you’ll find a prominent filter option to display only “Free” templates. This ensures you’re browsing only the complimentary options.
- Diverse Categories: Webflow organizes its templates into various categories such as Business, Portfolio, E-commerce, Blog, Landing Page, and more, making it easy to find a template suited for your specific industry or purpose.
- Quality Assurance: Templates featured on the official page undergo a rigorous review process by Webflow itself, guaranteeing high standards of design, responsiveness, and adherence to platform best practices. This provides a baseline of quality and functionality.
-
The Webflow Showcase (Community-Driven Innovation)
- Location: A vibrant community platform found at https://webflow.com/discover/showcase.
- “Cloneable” Projects: The key here is to look for projects explicitly marked as “Cloneable.” When a designer shares a project as cloneable, they are making the entire Webflow project—including its structure, styles, interactions, and CMS setup—available for anyone to duplicate into their own Webflow account.
- Unleashed Creativity: The Showcase is where you’ll often find the most innovative, experimental, and cutting-edge designs. Many top Webflow designers use it to share advanced techniques, unique layouts, and intricate interactions that push the boundaries of Webflow’s capabilities. It’s an excellent source of inspiration and learning.
- Variety of Complexity: You’ll find everything from simple one-page sites to complex multi-page structures with advanced animations. Pay attention to the project’s description and preview to gauge its complexity.
-
Third-Party Websites and Community Resources
- Webflow-Focused Blogs & YouTube Channels: Many independent creators and Webflow agencies publish articles, tutorials, and video walkthroughs highlighting their favorite free templates or even offering their own custom cloneable projects. Searching for “Webflow free templates” on Google or YouTube will yield many results.
- Online Communities: Forums like the official Webflow Forum or subreddits like r/webflow are great places to ask for recommendations, find curated lists, or discover new cloneable projects shared by community members.
- Design Resource Aggregators: Some websites that curate design resources might occasionally feature free Webflow templates.
Important Note on Sourcing: While community and third-party resources offer immense variety, always exercise caution. Ensure the source is reputable, and ideally, preview the template thoroughly before cloning to confirm it meets your expectations for quality and functionality. Some community cloneables might be highly experimental or less optimized than official templates.
The Multifaceted Benefits of Embracing Webflow Free Templates
The decision to start with a Webflow free template can unlock a wealth of advantages, making professional web design more accessible and efficient than ever before.
-
Unparalleled Cost-Effectiveness: Design Without the Initial Financial Burden
- Zero Upfront Design & Development Fees: This is the most immediate and compelling benefit. For startups bootstrapping their operations, small businesses with limited marketing budgets, or individuals launching personal projects, free templates eliminate the significant initial investment typically associated with custom web design and development.
- Resource Reallocation: By saving on design and development costs, businesses can reallocate those precious resources to other critical areas, such as marketing, content creation, product development, or operational expenses.
- Risk Mitigation: For new ventures, free templates allow for rapid prototyping and market testing without a substantial financial commitment. If the initial concept needs pivoting, the investment lost is minimal.
-
Blazing Speed and Unmatched Efficiency: Accelerating Your Online Presence
- Rapid Time-to-Launch: Free templates provide a pre-built, fully structured foundation. This means you bypass the time-consuming initial phases of wireframing, structural design, and basic development. You can literally have a professional-looking website up and running in a fraction of the time it would take to build from scratch.
- Focus on Content and Strategy: With the design and development framework in place, your team can concentrate their efforts on what truly matters: crafting compelling content, optimizing for search engines, and developing effective marketing strategies. This strategic focus can lead to quicker market penetration and engagement.
- Streamlined Workflow: The template acts as a guide, providing a clear path for populating content and making stylistic adjustments, making the entire website creation process more intuitive and efficient.
-
An Invaluable Learning and Skill Development Platform
- Reverse Engineering for Mastery: For aspiring Webflow designers or those transitioning from other platforms, free templates are an unparalleled educational tool. By cloning a project, you gain full access to its underlying structure, class naming conventions, responsive settings, and interaction setups. You can “reverse engineer” how experienced professionals build complex layouts and dynamic elements.
- Exposure to Best Practices: Many official and highly-rated community templates adhere to Webflow’s best practices for clean structure, semantic HTML, efficient styling, and optimal performance. Studying these templates can instill good habits and a deeper understanding of Webflow’s capabilities.
- Safe Experimentation: Free templates provide a risk-free environment to experiment with Webflow’s features. You can try out different styling approaches, build custom interactions, or integrate new elements without the pressure of potentially breaking a live, custom-built site.
-
Professional Quality and Cutting-Edge Design Standards
- High-Caliber Aesthetics: Unlike generic templates from less sophisticated builders, Webflow’s free templates are designed by talented professionals. They reflect modern design trends, ensuring your website looks contemporary, visually appealing, and trustworthy.
- Inherently Responsive: You don’t need to manually configure responsiveness. These templates are built to adapt seamlessly to desktops, tablets, and mobile devices, providing an optimal viewing experience for all users.
- Built-in Functionality: Many templates come equipped with essential features such as pre-configured CMS collections (for blogs, portfolios), functional contact forms, and basic interactive elements, providing a rich starting point for your site’s functionality.
- Clean Code for SEO: Webflow’s engine generates clean, semantic HTML and CSS, which is inherently beneficial for search engine optimization. This foundation helps your site rank better and perform faster.
-
Unmatched Flexibility and Granular Customization
- True Design Freedom: This is a hallmark of Webflow. Unlike many other platforms where templates are rigid skins, Webflow templates are fully editable. You have complete control over every single element:
- Styling: Change colors, fonts, background images, gradients, shadows, borders, and more using Webflow’s visual CSS panel.
- Layouts: Rearrange sections, columns, and elements. Implement new grid or Flexbox structures.
- Content: Easily replace placeholder text, images, and videos with your own brand assets.
- Interactions: Modify existing animations or create entirely new ones from scratch.
- Structure: Add new pages, sections, or components, or remove unnecessary ones, without breaking the site’s integrity.
- Adaptability: A single free template can be adapted for a surprisingly wide range of purposes with sufficient customization. A “Business Starter” can become a personal portfolio, a local service website, or even a simple product showcase with creative modifications.
- True Design Freedom: This is a hallmark of Webflow. Unlike many other platforms where templates are rigid skins, Webflow templates are fully editable. You have complete control over every single element:
Important Considerations When Leveraging Webflow Free Templates
While Webflow free templates offer undeniable advantages, a thoughtful approach is essential to maximize their potential and avoid common pitfalls.
-
Achieving Uniqueness and Strong Branding
- The “Template Look” Challenge: If you use a popular free template without significant customization, your website might end up looking similar to many others. This can dilute your brand’s uniqueness and memorability.
- Branding Effort Required: You must allocate dedicated time and creative effort to infuse your distinct brand identity into the template. This involves:
- Color Palette: Replacing template colors with your brand’s primary and secondary colors.
- Typography: Implementing your brand fonts (or choosing new ones that align with your brand’s personality).
- Imagery & Visuals: Replacing stock photos with high-quality, on-brand photography or custom illustrations.
- Tone of Voice: Ensuring all copy reflects your brand’s unique voice and messaging.
- Customization Skill Level: The degree of uniqueness you can achieve is directly tied to your comfort and proficiency with the Webflow Designer. Basic users might only swap content, while intermediate users can modify layouts and styles, and advanced users can completely transform a template.
-
Feature Set Limitations and Scalability Considerations
- Core Functionality Focus: Free templates are typically designed to showcase core design and basic functionalities. If your project requires highly specialized or advanced features (e.g., complex multi-step forms with conditional logic, intricate user authentication systems, dynamic content filtering beyond basic CMS, or deep third-party API integrations), the template might only provide a starting point, and you’ll need to build these functionalities from scratch or integrate specific solutions.
- Scalability for Enterprise Needs: While Webflow itself is highly scalable, a free template might not be architected for the demands of very large, complex enterprise websites with extensive CMS item counts (thousands of blog posts), high traffic volumes, or intricate user roles. Such projects often benefit from a custom build by an experienced Webflow agency that can optimize the site structure from the ground up for extreme scale.
- Webflow Plan Dependencies: Be acutely aware that certain advanced Webflow features are tied to specific paid Webflow Site Plans. For instance:
- E-commerce functionality requires an E-commerce plan.
- Higher CMS item limits require higher CMS plans.
- Custom code within the
<head>tag (often needed for advanced integrations or analytics) requires a paid plan. - Publishing to a custom domain always requires a paid Site Plan. A free template might showcase these features, but you’ll need the appropriate subscription to publish them live.
-
Navigating the Learning Curve (It’s Still There!)
- Webflow Fundamentals are Key: While templates reduce the initial build time, they don’t eliminate the need to understand Webflow’s core concepts. To effectively customize a template, you’ll need to grasp:
- The Box Model: How elements (Div Blocks) are structured and how padding, margin, and borders affect layout.
- Classes and Combinations: How to apply and modify styles using classes, and how class combinations create specific design variations.
- Flexbox and Grid: Webflow’s visual tools for creating responsive and dynamic layouts.
- Interactions Panel: How to create and modify animations and interactive elements.
- CMS Basics: How to populate and link dynamic content.
- Template-Specific Structures: Some templates, particularly complex cloneables from the Webflow Showcase, might employ unique class naming conventions, nested structures, or advanced CSS techniques that require some time and effort to decipher and understand before you can confidently modify them.
- Webflow Fundamentals are Key: While templates reduce the initial build time, they don’t eliminate the need to understand Webflow’s core concepts. To effectively customize a template, you’ll need to grasp:
-
Support, Documentation, and Long-Term Viability
- Limited Direct Support: Unlike paid templates (which often come with creator support) or custom projects built by agencies (which include ongoing support), free templates typically do not offer direct support from their original creators. You’ll primarily rely on:
- Webflow University: Webflow’s excellent, free educational resource.
- Webflow Forum: A vibrant community where you can ask questions and get help.
- Community Tutorials: Independent blogs and YouTube channels.
- No Guarantees for Updates: There are no guarantees that free templates, especially community-contributed ones, will receive ongoing updates for compatibility with future Webflow features, browser changes, or security enhancements. Official Webflow templates are generally more reliable in this regard.
- Potential for “Dead Ends”: If a free template uses highly specific or complex custom code that you don’t understand, and the original creator is no longer active, you might hit a “dead end” if you need to modify that particular functionality.
- Limited Direct Support: Unlike paid templates (which often come with creator support) or custom projects built by agencies (which include ongoing support), free templates typically do not offer direct support from their original creators. You’ll primarily rely on:
Who Benefits Most from Webflow Free Templates?
Webflow free templates are particularly well-suited for several user profiles:
- Aspiring Web Designers: An excellent sandbox to learn Webflow’s intricacies by dissecting and modifying existing professional designs.
- Startups and Bootstrapped Businesses: Allows for a professional online presence without significant initial investment, enabling rapid market testing.
- Small Businesses and Local Services: Provides a quick and easy way to establish a credible online storefront or informational website.
- Freelancers and Portfolio Creators: Offers a streamlined path to showcasing work and attracting clients.
- Bloggers and Content Creators: Provides a ready-to-use platform for publishing articles and building an audience.
- Event Organizers: Quick setup for event landing pages and registration forms.
- Students and Educators: A free resource for learning web design principles and Webflow development.
Beyond the Template: Next Steps for Growth
While free templates are a fantastic starting point, as your project grows, you might find yourself needing more advanced features or a truly unique online presence. Here are potential next steps:
- Upgrade Your Webflow Plan: To unlock E-commerce, higher CMS limits, custom code in the head, and custom domain publishing, you’ll need to upgrade your Webflow Site Plan.
- Learn More Webflow: Invest time in Webflow University to master advanced features like custom interactions, advanced CMS filtering, and responsive design techniques.
- Integrate Third-Party Tools: Leverage Webflow’s integrations with tools like Zapier, Memberstack, or custom APIs to add more complex functionalities (e.g., memberships, dynamic content, custom dashboards).
- Consider a Paid Template: If you need a more niche design or more advanced pre-built features, Webflow’s marketplace offers a wide array of premium templates.
- Hire a Webflow Freelancer or Agency: For highly custom designs, complex integrations, or large-scale projects, partnering with an experienced Webflow freelancer or a specialized Webflow agency can provide the expertise needed to bring your most ambitious visions to life. They can take your template-based site to the next level or build something entirely bespoke.
How to Get Started with a Webflow Free Template: A Step-by-Step Guide
Embarking on your Webflow journey with a free template is a straightforward and rewarding process. Follow these steps to transform a template into your unique online presence:
- Create Your Webflow Account:
- If you haven’t already, head over to https://webflow.com/ and sign up for a free account. The free plan allows you to design and build extensively, but publishing to a custom domain and unlocking full CMS/E-commerce capabilities will require a paid Site Plan later.
- Discover and Select Your Template:
- Official Templates: Visit the official Webflow Templates page at https://webflow.com/templates. Use the “Free” filter to narrow down your options. Browse through categories like “Business,” “Portfolio,” “Blog,” “Landing Page,” and “E-commerce” to find a design that generally aligns with your project’s purpose and aesthetic preferences.
- Community Showcase: Explore the Webflow Showcase at https://webflow.com/discover/showcase. Look for projects explicitly marked as “Cloneable.” These often feature more experimental designs and advanced interactions.
- Preview Thoroughly: Before making a choice, always click on the template to view its live demo. Pay close attention to:
- Layout and Structure: Does the overall layout make sense for your content?
- Design Aesthetic: Do the colors, fonts, and imagery resonate with your brand?
- Responsiveness: Resize your browser window to see how it adapts to different screen sizes.
- Included Features: Does it have sections for testimonials, team members, a blog, or a contact form if you need them?
- Interactions: Are there any pre-built animations or interactive elements you like?
- Clone the Project into Your Dashboard:
- Once you’ve chosen a template, look for the “Use for Free” (on official template pages) or “Clone in Webflow” (on Showcase projects) button.
- Clicking this button will prompt you to name your new project. Choose a descriptive name, and Webflow will create an exact copy of the template within your own Webflow Dashboard.
- Open in the Webflow Designer and Begin Customization:
- From your Webflow Dashboard, click on your newly cloned project to open it in the Webflow Designer. This is your visual development environment.
- Content Replacement First: Start by replacing all placeholder text, images, and videos with your own content. This is the quickest way to see your brand come to life within the template.
- For text: Double-click on any text element to edit it.
- For images: Select an image element, go to the Settings panel (gear icon) on the right, and replace the image source.
- Brand Styling: Now, dive into the Style panel (brush icon) on the right:
- Colors: Update background colors, text colors, button colors, and link colors to match your brand’s palette. You can define global color swatches for consistency.
- Typography: Change fonts for headings, paragraphs, and links. Webflow integrates with Google Fonts and Adobe Fonts, or you can upload custom fonts.
- Spacing: Adjust padding and margins on sections, containers, and elements to fine-tune the layout and visual hierarchy.
- Borders & Shadows: Customize these elements for buttons, cards, or other design components.
- Layout Adjustments:
- Add/Remove Sections: Use the Navigator panel (layers icon) to easily select, duplicate, or delete entire sections of the page.
- Rearrange Elements: Drag and drop elements within sections to change their order or position.
- Modify Grids/Flexbox: If the template uses CSS Grid or Flexbox, use the layout controls in the Style panel to adjust column counts, row heights, alignment, and spacing.
- CMS Population (if applicable):
- If your template includes CMS Collections (e.g., for a blog or portfolio), navigate to the CMS panel (content icon).
- Add new Collection Items, populate them with your dynamic content (titles, images, rich text, etc.), and watch them automatically appear on your CMS-driven pages.
- Form Configuration:
- If the template has a contact form, select the form element. In the Settings panel, configure where form submissions should be sent (e.g., your email address).
- For more advanced form integrations (CRM, marketing automation), you might need to use Webflow’s native integrations or tools like Zapier/Make.
- Interactions (Optional):
- If the template has pre-built interactions, explore the Interactions panel (lightning bolt icon) to see how they are set up. You can modify triggers, animations, and timing, or create entirely new interactions.
- Preview Your Work:
- Regularly use the “Preview” button (eye icon) in the top bar of the Designer to see how your site looks and behaves in a live browser environment.
- Use the responsive breakpoints (desktop, tablet, mobile icons) in the top bar to check your design across different devices.
- Prepare for Launch (Requires Webflow Site Plan):
- SEO Settings: Go to Page Settings (gear icon next to each page in the Pages panel) to set meta titles, meta descriptions, and open graph settings for SEO and social sharing.
- Favicon & Webclip: Upload your favicon and webclip icons in Project Settings > General.
- Custom Code (if needed): If you need to add external scripts (e.g., for analytics, chat widgets), go to Project Settings > Custom Code. Remember, custom code in the
<head>requires a paid Webflow plan. - Publish: When you’re ready, click the “Publish” button in the top right corner.
- Free Plan: You can publish to a
webflow.iosubdomain (e.g.,yourprojectname.webflow.io). - Paid Site Plan: To use a custom domain (e.g.,
yourdomain.com) and unlock full features, you’ll need to subscribe to a Webflow Site Plan and connect your domain.
- Free Plan: You can publish to a
By following these steps, you can effectively transform a free Webflow template into a professional, unique, and high-performing website that perfectly serves your digital needs.
50+ Free Webflow Templates and Cloneable Projects
This curated list features a diverse range of excellent free resources from the official Webflow Templates page and highly-rated cloneable projects from the Webflow Showcase. These are fantastic starting points for various types of websites, from portfolios and business sites to blogs and landing pages.
Official Webflow Free Templates
These templates are curated by Webflow, ensuring high quality, responsiveness, and adherence to platform best practices.
- Portfolio Starter
- Description: A clean and modern portfolio template ideal for designers, photographers, or artists to showcase their work with a professional touch.
- Link: https://webflow.com/templates/html/portfolio-starter-website-template
- Startup
- Description: A versatile and professional template designed for startups and small businesses, featuring essential sections for services, team, and clear contact information, ready for quick customization.
- Link: https://webflow.com/templates/html/startup-website-template
- Blog Starter
- Description: A simple yet elegant template for bloggers and content creators, providing a clean layout for articles, categories, and author profiles, making content creation straightforward.
- Link: https://webflow.com/templates/html/blog-starter-website-template
- Business Starter
- Description: A professional and straightforward template for general business websites, focusing on presenting services, client testimonials, and clear calls to action.
- Link: https://webflow.com/templates/html/business-starter-website-template
- Landing Page Starter
- Description: A focused and conversion-optimized template perfect for creating high-performing landing pages for products, services, events, or lead generation campaigns.
- Link: https://webflow.com/templates/html/landing-page-starter-website-template
- E-commerce Starter
- Description: A foundational template for setting up an online store, complete with customizable product pages, categories, a shopping cart, and a basic checkout flow, integrated with Webflow’s E-commerce features.
- Link: https://webflow.com/templates/html/e-commerce-starter-website-template
- Photography Portfolio
- Description: A visually driven template designed specifically for photographers, artists, or visual creatives to display their work in compelling gallery and project formats.
- Link: https://webflow.com/templates/html/photography-portfolio-website-template
- Agency Starter
- Description: A professional and modern template tailored for creative agencies, marketing firms, or service-based businesses, showcasing services, team members, and client work effectively.
- Link: https://webflow.com/templates/html/agency-starter-website-template
- Restaurant Starter
- Description: A clean and inviting template for restaurants, cafes, or food establishments, featuring sections for menus, online ordering links, location details, and contact information.
- Link: https://webflow.com/templates/html/restaurant-starter-website-template
- Coming Soon
- Description: A simple yet effective single-page template to announce your upcoming website, product launch, or event, often including a countdown timer and email signup form.
- Link: https://webflow.com/templates/html/coming-soon-website-template
- Pricing Page
- Description: A dedicated and clearly structured page template for presenting different pricing tiers and plans for your services, software, or products, designed for clarity and conversion.
- Link: https://webflow.com/templates/html/pricing-page-website-template
- Contact Page
- Description: A straightforward and professional template for a contact page, typically including a functional contact form, map integration, and various contact details.
- Link: https://webflow.com/templates/html/contact-page-website-template
- About Page
- Description: A clean and organized template for sharing your company’s story, mission, values, and team members, building trust and connection with your audience.
- Link: https://webflow.com/templates/html/about-page-website-template
- Style Guide
- Description: Not a full website, but an essential template for establishing and maintaining consistent branding, typography, color palettes, and component styling across your Webflow projects.
- Link: https://webflow.com/templates/html/style-guide-website-template
- 404 Page
- Description: A basic but crucial template for a custom “Page Not Found” error page, providing a user-friendly message and navigation options when a requested page doesn’t exist.
- Link: https://webflow.com/templates/html/404-page-website-template
Webflow Showcase Cloneable Projects (Community Contributions)
The Webflow Showcase is a vibrant hub where Webflow designers and developers share their creations as “cloneable” projects. These often feature innovative designs, advanced interactions, and unique solutions. Note: As these are community-driven, specific features and ongoing support may vary.
- Relume Website Cloneable
- Description: A highly popular cloneable project renowned for its extensive library of pre-built components and clean, organized structure, making it an excellent starting point for rapid prototyping and consistent builds.
- Link: https://webflow.com/made-in-webflow/website/relume-website-cloneable
- Creative Agency Template
- Description: A modern and dynamic template suitable for creative agencies, design studios, or marketing firms looking to showcase their services, portfolio, and team with engaging visuals.
- Link: https://webflow.com/made-in-webflow/website/creative-agency-template
- The Agency – Cloneable Template
- Description: A sleek and professional template designed specifically for agencies, featuring clear calls to action, well-structured service sections, and a clean aesthetic.
- Link: https://webflow.com/made-in-webflow/website/the-agency-cloneable-template
- Solveig – Free Cloneable Portfolio Template
- Description: A minimalist and elegant portfolio template, perfect for showcasing creative work with a strong focus on high-quality visuals and a clean presentation.
- Link: https://webflow.com/made-in-webflow/website/solveig-free-cloneable-portfolio-template
- Skillex Online Education
- Description: A vibrant and engaging template for online education platforms, individual courses, or e-learning initiatives, with appealing layouts for course listings and instructor profiles.
- Link: https://webflow.com/made-in-webflow/website/skillex-online-education
- Kabello Design Agency – Cloneable Template
- Description: A stylish and modern template for design agencies, characterized by bold typography, striking imagery, and interactive elements to create a memorable impression.
- Link: https://webflow.com/made-in-webflow/website/kabello-design-agency-cloneable-template
- Disruptive Social – Creative Agency in London
- Description: A visually striking template for a creative agency, featuring bold imagery, unique asymmetrical layouts, and dynamic elements to convey a modern and innovative brand.
- Link: https://webflow.com/made-in-webflow/website/disruptive-social-creative-agency-in-london
- Client Dashboard Template – ZERO CODE
- Description: A functional cloneable project demonstrating how to build a client dashboard, internal portal, or simple CRM interface entirely within Webflow, showcasing dynamic content and basic interactions.
- Link: https://webflow.com/made-in-webflow/website/client-dashboard-template-zero-code
- Good Time Agency
- Description: A cheerful and modern agency template with a playful design, vibrant colors, and engaging layouts, suitable for creative services that want to convey a friendly and approachable brand.
- Link: https://webflow.com/made-in-webflow/website/good-time-agency
- Aluce – Cloneable!
- Description: A clean and elegant multi-purpose template, highly adaptable for various business or personal websites, featuring a sophisticated color palette and well-organized sections.
- Link: https://webflow.com/made-in-webflow/website/aluce-cloneable
- Artisan Website Company
- Description: A sophisticated template for a creative or artisan business, emphasizing craftsmanship, quality, and a refined aesthetic through elegant typography and balanced layouts.
- Link: https://webflow.com/made-in-webflow/website/artisan-website-company
- Imaginary – A free Agency Style Template
- Description: A sleek and professional template for agencies or creative businesses, characterized by a modern, minimalist aesthetic, ample whitespace, and clean typography.
- Link: https://webflow.com/made-in-webflow/website/imaginary-a-free-agency-style-template
- Framer Cloneable
- Description: A cloneable project demonstrating how to achieve advanced, fluid, and interactive animations often seen in Framer designs, showcasing Webflow’s capabilities for complex interactions.
- Link: https://webflow.com/made-in-webflow/website/framer-cloneable
- Minimal Portfolio
- Description: A very clean and straightforward portfolio template, designed to put the absolute focus entirely on your work with minimal distractions and a refined layout.
- Link: https://webflow.com/made-in-webflow/website/minimal-portfolio-template
- SaaS Landing Page
- Description: A conversion-focused landing page template specifically designed for SaaS products or software, featuring clear value propositions, feature highlights, and strong calls to action.
- Link: https://webflow.com/made-in-webflow/website/saas-landing-page-template
- Personal Website Template
- Description: A versatile template for individuals looking to create a personal brand site, online resume, simple portfolio, or a professional online presence.
- Link: https://webflow.com/made-in-webflow/website/personal-website-template
- Clean Blog Layout
- Description: A modern and easy-to-read blog layout, perfect for content creators who prioritize readability, clear content hierarchy, and a streamlined user experience.
- Link: https://webflow.com/made-in-webflow/website/clean-blog-layout
- Product Landing Page
- Description: A template optimized for showcasing a single product with clear features, benefits, compelling imagery, and a prominent call-to-action to drive conversions.
- Link: https://webflow.com/made-in-webflow/website/product-landing-page
- Startup Landing Page
- Description: A vibrant and engaging landing page for new startups, designed to capture attention, communicate value propositions quickly, and generate early leads.
- Link: https://webflow.com/made-in-webflow/website/startup-landing-page
- Event Landing Page
- Description: A specialized template for promoting events, conferences, or workshops, with dedicated sections for speakers, event schedules, location details, and registration forms.
- Link: https://webflow.com/made-in-webflow/website/event-landing-page
- Minimal Business Website
- Description: A sleek and professional template for businesses that prefer a minimalist aesthetic, focusing on essential information and a clean, uncluttered design.
- Link: https://webflow.com/made-in-webflow/website/minimal-business-website
- Podcast Website Template
- Description: A specialized template for podcasters to showcase episodes, embed audio players, provide show notes, and build a community around their content.
- Link: https://webflow.com/made-in-webflow/website/podcast-website-template
- App Landing Page
- Description: A modern and clean landing page designed to promote mobile applications, highlighting key features, user benefits, and clear download links to app stores.
- Link: https://webflow.com/made-in-webflow/website/app-landing-page
- Creative Portfolio Layout
- Description: A dynamic portfolio layout with interesting grid structures, interactive elements, and a focus on visual storytelling for creative professionals.
- Link: https://webflow.com/made-in-webflow/website/creative-portfolio-layout
- Service Business Template
- Description: A straightforward template for service-based businesses to clearly outline their offerings, showcase testimonials, introduce their team, and provide easy contact options.
- Link: https://webflow.com/made-in-webflow/website/service-business-template
- Simple Blog
- Description: An uncluttered and easy-to-navigate blog template, prioritizing content delivery and a clean reading experience for your audience.
- Link: https://webflow.com/made-in-webflow/website/simple-blog
- One Page Portfolio
- Description: A concise single-page portfolio template for quickly showcasing key projects, skills, and contact details, ideal for a quick online presence.
- Link: https://webflow.com/made-in-webflow/website/one-page-portfolio
- Modern Business Landing Page
- Description: A contemporary landing page for businesses, featuring bold visuals, clear messaging, and a strong focus on driving specific user actions.
- Link: https://webflow.com/made-in-webflow/website/modern-business-landing-page
- Resume Website
- Description: A professional and interactive online resume template to highlight your skills, experience, education, and contact information in an engaging format.
- Link: https://webflow.com/made-in-webflow/website/resume-website
- Basic E-commerce Store
- Description: A fundamental e-commerce setup with product listings, a simple cart, and a streamlined checkout process, perfect for getting started with online sales.
- Link: https://webflow.com/made-in-webflow/website/basic-e-commerce-store
- Clean SaaS Landing Page
- Description: A minimalist and highly effective landing page for SaaS products, emphasizing clarity, user-friendliness, and a direct path to conversion.
- Link: https://webflow.com/made-in-webflow/website/clean-saas-landing-page
- Personal Brand Website
- Description: A template designed for individuals to build a strong personal brand online, featuring sections for a bio, services, testimonials, and contact information.
- Link: https://webflow.com/made-in-webflow/website/personal-brand-website
- Digital Agency Template
- Description: A modern and professional template suitable for digital marketing or design agencies, showcasing their expertise and services with a contemporary design.
- Link: https://webflow.com/made-in-webflow/website/digital-agency-template
- Portfolio Grid Layout
- Description: A flexible grid-based layout for showcasing multiple projects, images, or creative assets in an organized and visually appealing manner.
- Link: https://webflow.com/made-in-webflow/website/portfolio-grid-layout
- Minimalist Blog
- Description: A very stripped-down and clean blog template, designed for a distraction-free reading experience, putting the content at the forefront.
- Link: https://webflow.com/made-in-webflow/website/minimalist-blog
- Simple Portfolio
- Description: A straightforward and elegant portfolio template to quickly get your creative or professional work online with a clean and effective presentation.
- Link: https://webflow.com/made-in-webflow/website/simple-portfolio
- Company Profile
- Description: A concise template for a company’s online profile, including sections for services, team, mission, and essential contact information, ideal for a quick informational site.
- Link: https://webflow.com/made-in-webflow/website/company-profile
How to Effectively Utilize These Templates for Your Project
Leveraging these free Webflow templates and cloneable projects effectively involves a strategic approach to customization and optimization:
- Start with a Clear Vision: Before selecting a template, have a clear idea of your website’s purpose, target audience, and desired aesthetic. This will help you choose a template that aligns closely with your vision, reducing the amount of heavy customization needed.
- Content First, Design Second (for efficiency): Once you’ve cloned a template, prioritize replacing all placeholder text and images with your actual content. Seeing your own content in place will give you a much clearer idea of how the design works and what adjustments are needed. This also ensures your content fits the layout naturally.
- Brand Infusion is Key: Don’t just swap content; infuse your unique brand identity. This involves:
- Color Palette: Use Webflow’s global color swatches to easily update all instances of a color across your site.
- Typography: Apply your brand’s primary and secondary fonts consistently. Pay attention to font sizes, line heights, and letter spacing for optimal readability.
- Imagery: Replace stock photos with high-quality, relevant, and on-brand images or custom illustrations. Ensure images are optimized for web (compressed) to maintain fast loading times.
- Tone of Voice: Rewrite the copy to reflect your brand’s unique voice—whether it’s formal, playful, authoritative, or friendly.
- Master Webflow Fundamentals (as you go): Even with a template, a basic understanding of Webflow’s core concepts will empower you. Spend time in Webflow University learning about:
- The Box Model: Understanding how padding, margin, and borders affect element spacing.
- Classes and Combinations: How to apply and modify styles efficiently using Webflow’s class system.
- Flexbox and Grid: These powerful layout tools are fundamental to creating responsive designs. Learn how to adjust them visually.
- Interactions: If the template has animations, learn how to modify or create new ones in the Interactions panel.
- Optimize for Responsiveness: While templates are responsive by default, always double-check and fine-tune layouts for different breakpoints (desktop, tablet, mobile landscape, mobile portrait). Use Webflow’s responsive view toggles in the Designer to ensure a flawless experience on all devices. Adjust font sizes, image sizes, and element spacing as needed for smaller screens.
- SEO Basics from the Start:
- Page Settings: For every page, go to the page settings (gear icon next to the page name in the Pages panel) and fill in the SEO Title, Meta Description, and Open Graph settings. These are crucial for how your site appears in search results and on social media.
- Image Alt Text: Always add descriptive alt text to all your images. This is vital for accessibility and helps search engines understand your image content.
- Clean URLs: Ensure your page URLs are clean, readable, and include relevant keywords.
- Test Forms and Interactions: Before publishing, thoroughly test all forms to ensure submissions are being sent to the correct email address or integrated service. Test any interactive elements or animations to confirm they function as expected across different browsers.
- Consider Performance: While Webflow’s hosting is fast, large images or excessive animations can slow down your site. Optimize images before uploading them, and use Webflow’s built-in image optimization features.
- Plan for Growth: Think about your long-term needs. If your website will eventually require advanced features like user accounts, complex databases, or highly custom integrations, understand that a free template will likely serve as a foundational layer, and you’ll need to build upon it or consider a custom solution down the line.
By meticulously customizing and optimizing these free Webflow templates, you can create a professional, unique, and high-performing website that not only looks exceptional but also effectively serves your digital goals, all while leveraging the power and efficiency of the Webflow platform.

